Organizing music project
3 tips how to organize projects, files, and folders
Hi, Daniel. Looking at your Ableton screenshots I’ve noticed that you colorize all channels exactly the same way, with kick being red, bassline being orange, and so on. Does it have a meaning? How do you organize projects?
Ewan Wood
Well spotted, Ewan! Yes, I use colour labels for all channels in my projects indeed, it saves time and helps a lot. But not only that.
Taking this opportunity, I would like to share my 3 tips for organizing projects, files, and folders.
1. Use colour and text labels
My very first Ableton project had absolutely random colours, channels positions, and no text labels at all. It was such a mess! Although there were just about 20-30 channels in total, so it was kinda okay.

Laidback Luke is trying to find a bass in his project; “So funny because I keep everything gray as it just looks nicer, but I will always be searching for my channels”
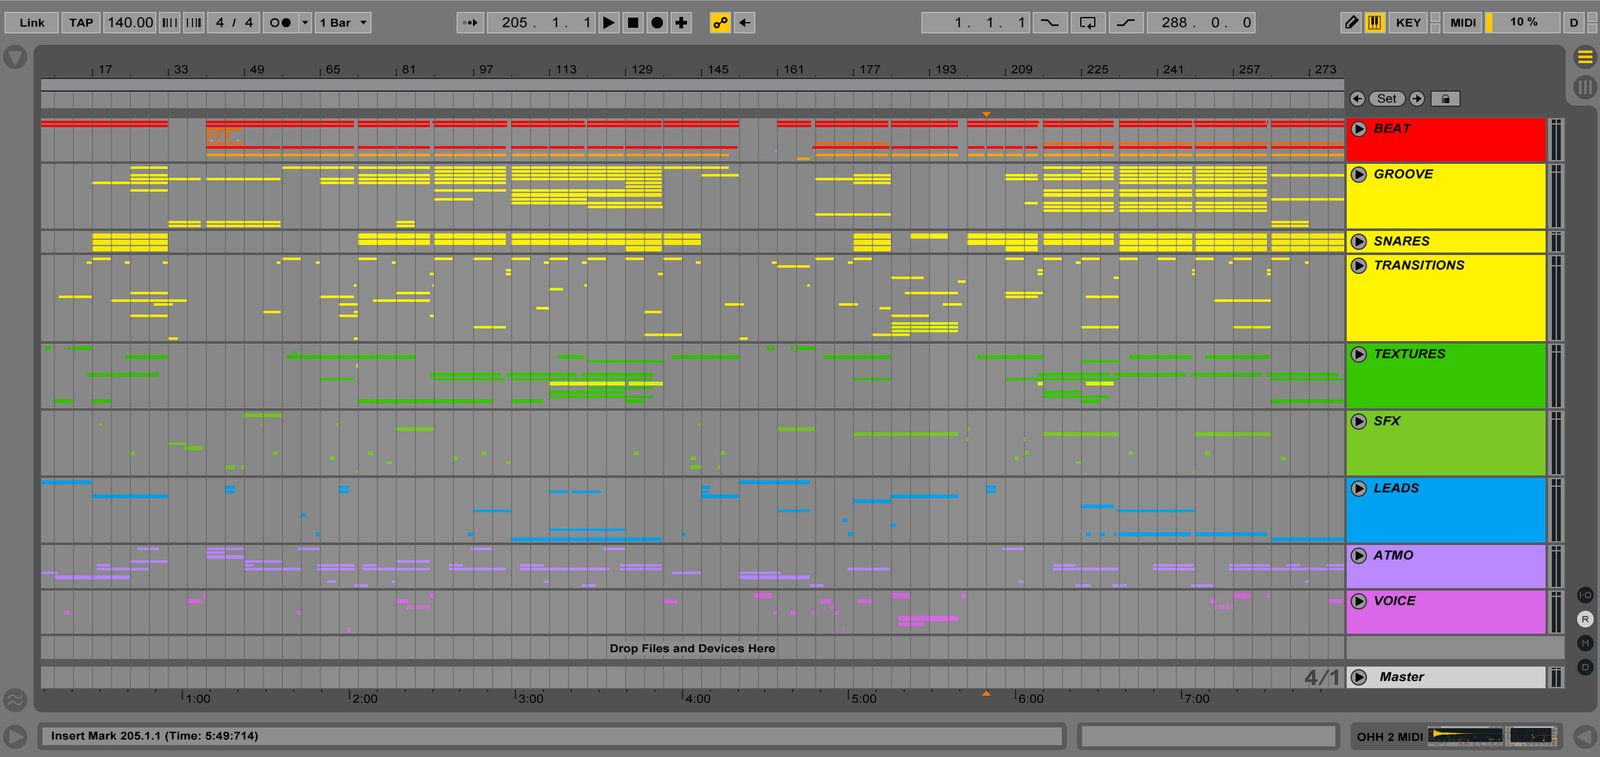
On a contrast, my current projects usually have around 90-120 channels, so I would spend nearly half of my studio time scrolling and looking for a right channel if I’d keep being such irresponsible to this chaos.
So I’ve set myself a rule: whether I create a new Audio or MIDI channel, I always add colour and text labels first before putting any plugins or devices, and same applies to Audio and MIDI clips.
I divide all channels into larger categories and group them together, even if they don’t have any common processing. In other words, those groups are mostly used just to keep things clear. Usually, my groups and color labels will be like this:
| Group | Channels in there |
| Beat | Kick and bass |
| Groove | Percussions, cymbals, hats |
| Transitions | Drum fills, noise sweeps |
| Textures | FM, glitch sounds, stabs |
| SFX | One-shot special effects |
| Leads | Synths, aprs, chords |
| Atmo | Ambient pads, strings |
| Voice | Vocal samples |
These colours don’t have any hidden meaning in it, although someone may find a similarity with chakras where red is also the base colour and violet is on top :-) The point is I always know where is my bass, lead, and even “that peeeeow sound”. No more wasting time of scroll through the project window!
Going further on the previous point, I also suggest naming your channels properly. Imagine if you would open this project one year later, having a hundred of channels named like “New Audio Copy 2” is certainly not the best way.
Make yourself’s life a bit easier by naming it like this:
| No | Yes |
| Audio 89 | Bassline main MIDI |
| Sub | Sub-bass with sidechain MIDI |
| Sylenth1 Copy | Chords progression MIDI |
| VEE Clap 13 | Clap reverse reverb WAV |
2. Name project files and folders properly
Quite often I see funny pictures in social media and blogs about music producers who name their project files like “New1”, “FinalFinal” etc.

“Every producer in the world have this problem”
I always thought it’s just a geek’s humour, but after speaking to fellow producers, it turned out that this problem is real: some people really struggle to find their own project files because of this! I never had this issue because, intuitively, I’ve made myself a system keeps things clear.
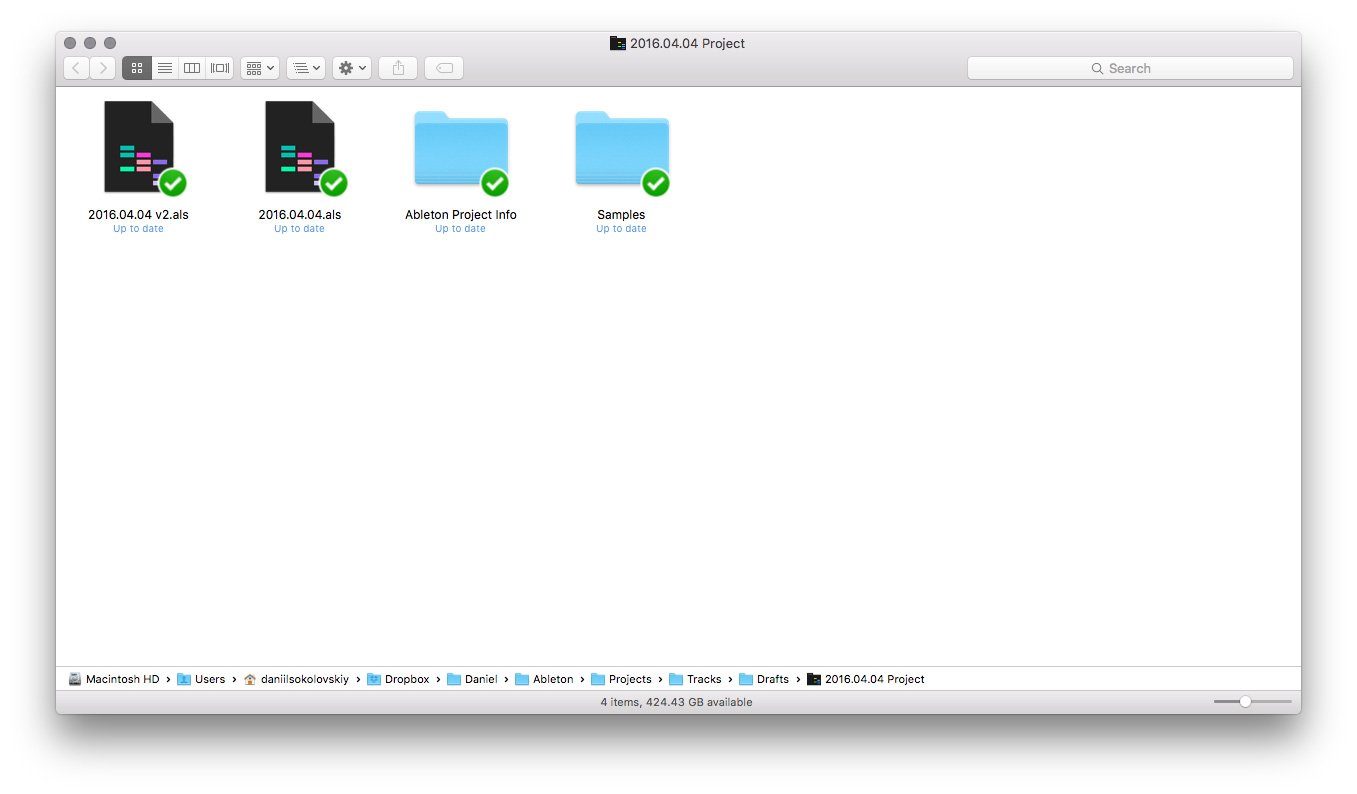
So, basically, I have two folders on my disk called “Drafts” and “Finished”.
When I create a new project, I save it in the “Drafts” folder and name it by the current date, e. g. “2016.08.24 Project”. This helps me to see when I started this project to make sure I don’t work on this for too long. If during production I do some significant change, I save it as another version with the incremental numbers, like v2, v3, v4 etc. So usually each project folder has several files (versions) in it.
Once the project is done, I rename it to the final track name and move to the “Finished” folder, which groups tracks by release title — albums and EPs.
These manipulations are so simple, yet makes all projects easily accessible. At any time, I know exactly where to find a project folder of “Enuma Elish” or “that track which I started a month ago”.
Enuma Elish, 2015
3. Put your project folder in the cloud
We used to think that everything lasts forever, including our computers and disk drives. In reality, I often see how music producers get lost the results of their hard work for very various reasons: the DAW had crashed and not saved the last session, or the neighbour accidentally shut down power in your apartment, making your HDD died.
To keep your projects and nerves safe, I highly recommend get yourself cloud storage and put your entire project folder in there. Google Drive, Amazon, Dropbox, Apple, whatever.
Personally, I use Dropbox. Every time I save the project, it gets instant and continuous backups, automatically. And if something goes wrong, I can download it back to another computer or even restore from a different version (Dropbox has “Version history”, not sure about other services).
Another little tip is to use “File → Collect All and Save” function to make sure all of the samples used in this project are gathered in the project folder, and hence, get a backup in the cloud. This way you won’t open your project with a “missing audio” warning.
Recap:
- Mark all channels and clips with colour and text labels. Wrap channels into larger groups to easily navigate through the project
- Make yourself a system to name project folders properly. Current date can work.
- Put your entire projects folder into Dropbox or Google Drive to get continuous backups. Still, do manual backups to external disk from time to time.