How to record a DJ set with crowd noise
I try to record my sets during my shows to listen to them later. It’s also great content that’s nice to share.
But I especially like it when the music is supported by the crowd cheering from the dancefloor: it gives a much better sense that it’s actually a real live recording and not just another studio mix.
Here is how I do it.
The recorder
Just recording a set is usually not a problem: some models of DJ equipment have this feature built-in, and if you play with software like Rekordbox or Traktor, it is even a matter of pressing a button. However, to record a set with crowd noise, you’ll need a special device – an external recorder.

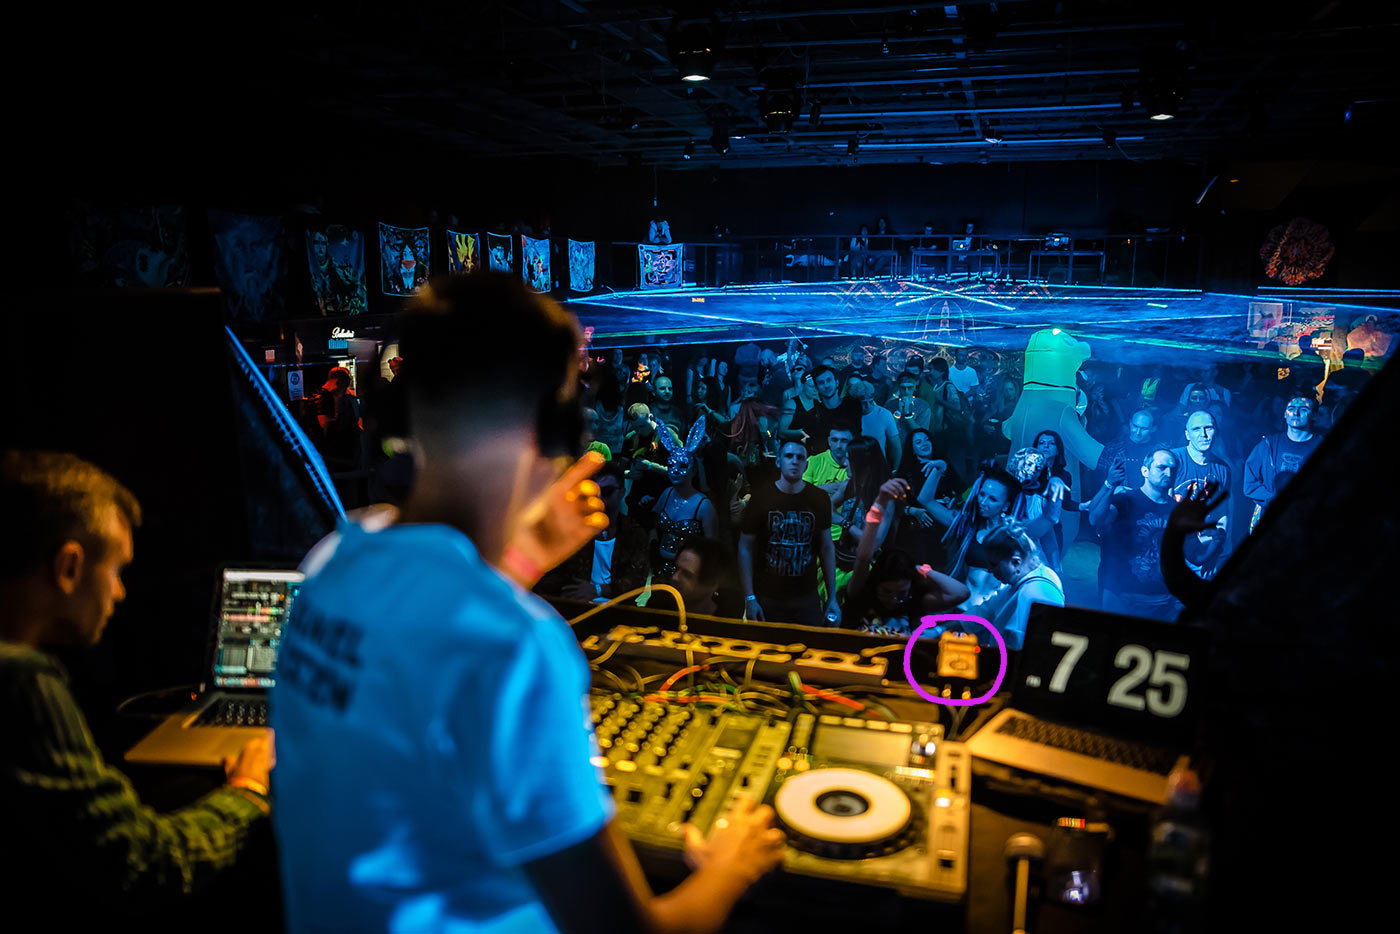
I use the Tascam DR-40X. It’s a four-channel recorder, in other words with two pairs of stereo channels: one pair of channels records clean audio directly from the DJ mixer through the line input, and the second pair records the dance floor sounds through the built-in microphones.
The recorder uses an SD card as the media. I bought a SanDisk Ultra with 80MB/s and 16GB capacity, and it’s enough to record about ten hours of audio. It powers from AA batteries, as well as via micro-USB. There is a 1/4” screw jack on the bottom, so you can put the recorder on a tripod.
Connectivity
The recorder is connected to the mixer this way: from the mixer via Rec Out or Master 2 using RCA connectors to the recorder via Line In using XLR or 1/4-inch jack connectors. A cable like this would work, for example.

The main difference between the Rec Out and Master 2 outputs is that Rec Out ignores volume changes on the mixer’s master channel. It means that if you change the master volume during the set (I usually do not advise doing so, but sometimes you need to), it will not affect the recording in any way: the audio will remain even, without volume dips. Therefore, if possible, it is better to use Rec Out.
Settings
This recorder has a hundred different settings, but in this context, only three are important: the selection of an external source, the type of recording mode, and the volume level adjustment.
The external source is switched on the side using the slider: Ext In → Line. This way the recorder will know that the incoming signal is line level (and the output from the DJ mixer is exactly that), so no distortion will occur.
The recording mode is selected by a dedicated button of the same name: Rec Mode → 4CH. In our case, we need to use all four channels, as I explained above, so we select 4CH. The corresponding indicator to the left should light up.
The volume level is adjusted in the main menu: Menu → Rec Settings → Level: -48dB. This means that the incoming signal will be recorded very quietly, but this is not a problem since we can increase the volume afterwards during processing. This way it is guaranteed that there will be no clipping and the recording will be clean.
Obviously, if you have a different recorder, these settings may be somewhere else, have some other name or not be present at all. But you need all three for quality set recording, which is why I chose the Tascam DR-40X.
Processing
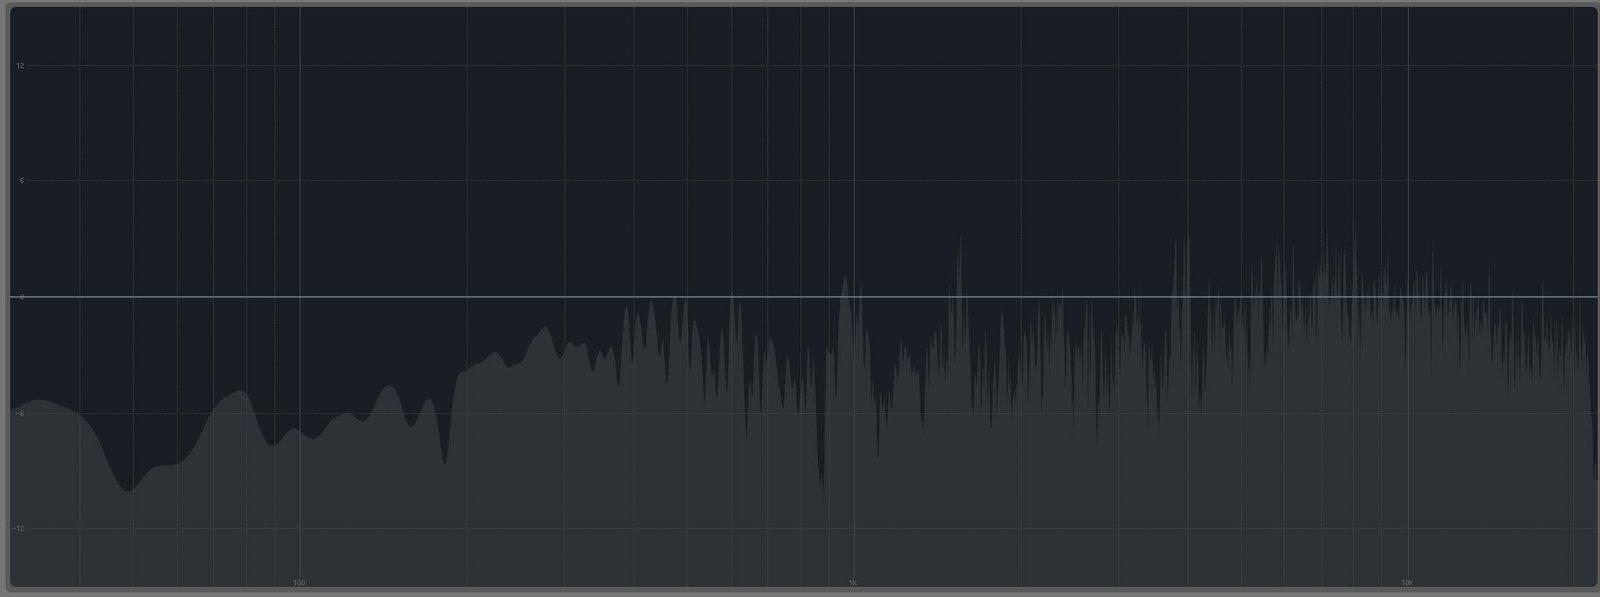
After the recording, there will be two audio files on the SD card: a clean recording from the mixer and a recording of the dancefloor from the microphone.
It’s worth understanding that the microphone can’t record people’s screaming only; instead, it records everything, including music from the dancefloor, usually with overloaded low frequencies. So don’t be surprised if you hear a muffled “boomy” audio in this file, it’s okay.
Then it’s just a matter of increasing the volume of the mixer recording (since we recorded it at -48dB), lowering the volume of the microphone recording, removing unnecessary low frequencies with a filter, and stacking the two audio tracks. All this I do in Ableton Live.

Here’s how these audio tracks sound individually and together:
Well, and that’s about it. From there just hit export and upload it to Soundcloud to make your fans happy :-)

Hey Daniel!
Thanks for the description. What other recording and file settings do you have to get great quality on your mixes?
Henrik, Sweden