Controlling parameters in Ableton using clips modulation
How to make a non-destructive editing of automated parameters so I could change it in one place and apply to the entire clip’s length?
Ilya Birman
Let’s say, we have some bassline with cut-off automation recorded using a MIDI-controller:
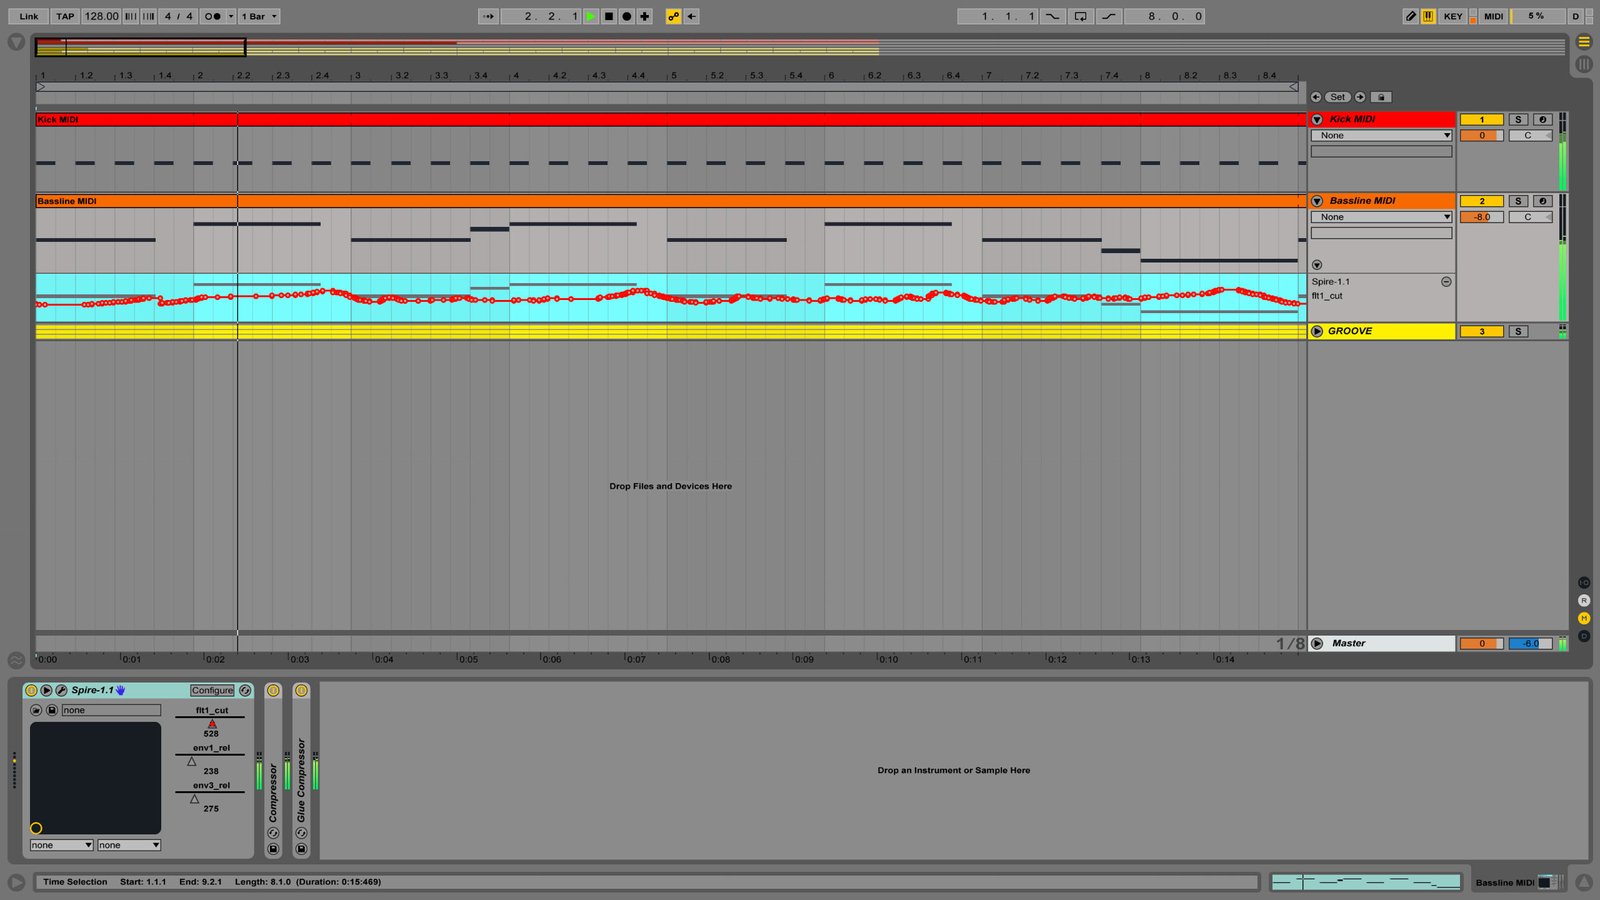
It’s only an eight bars long loop and we want to stretch it out for the entire track’s duration. The problem is when you stretch out the clip, the automation didn’t follow along the way:
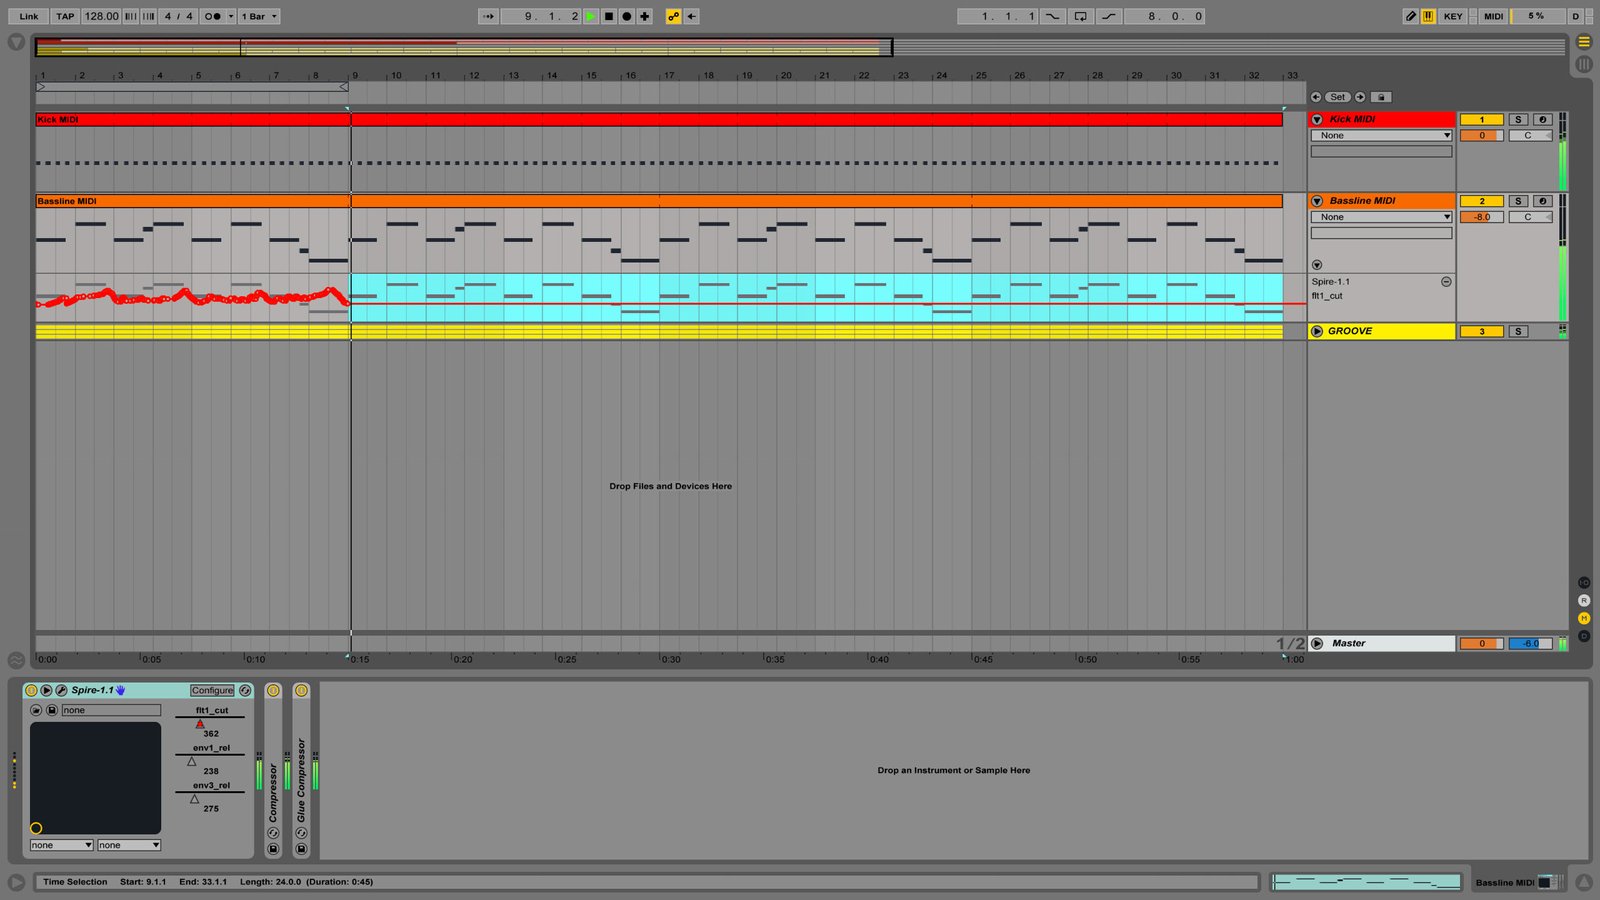
The obvious ways of making the automation keep going are:
- Flatten automation into a solid piece of audio
- Copy-paste automation manually throughout the entire duration
As you can guess, both of these methods aren’t perfect: flattening is a destructive type of editing meaning you cannot go back to fix it if anything is needed, and copying-and-pasting manually is just not very productive. Besides, if you want to change anything in this automation, you would need to copy-paste all the changes again and that’s not what we want.
But here is a better way to solve this — using modulation.
Modulation is pretty much the same as automation, but with two key differences: it controls parameters within the clips (not on the global timeline) and relative to the defined parameter value.
Modulation vs. Automation. Ableton Live knowledge base
Do the right-click on the parameter you want to control and select “Show Modulation”:
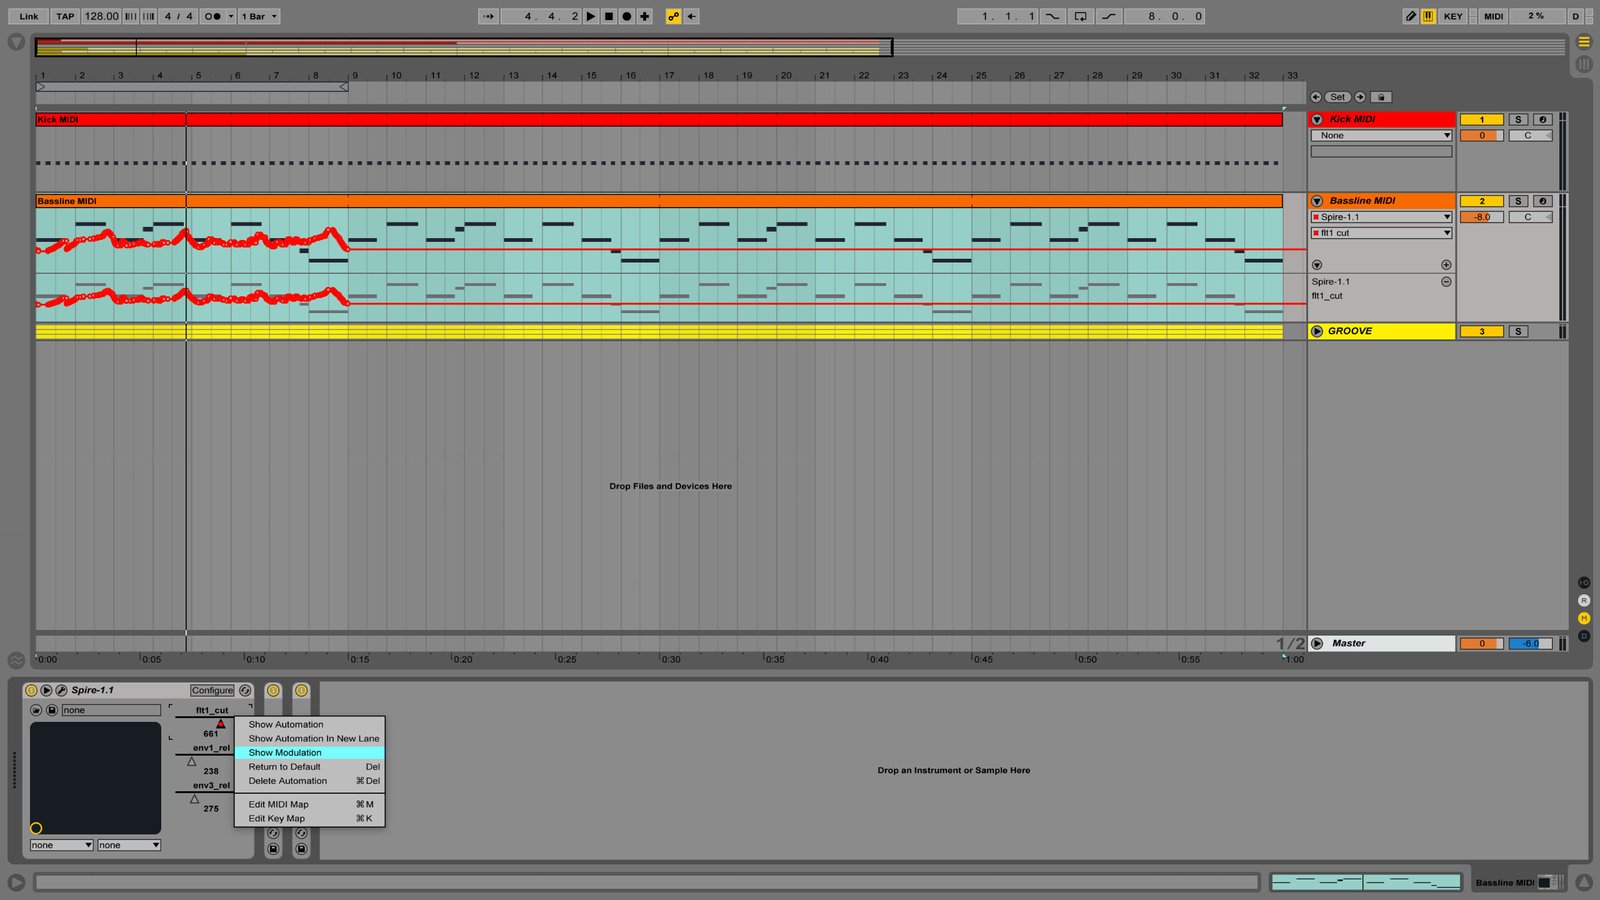
You’ll see a MIDI editor with the Envelopes tab opened. Copy and paste there all the curves from timeline automation to this area. Like this:
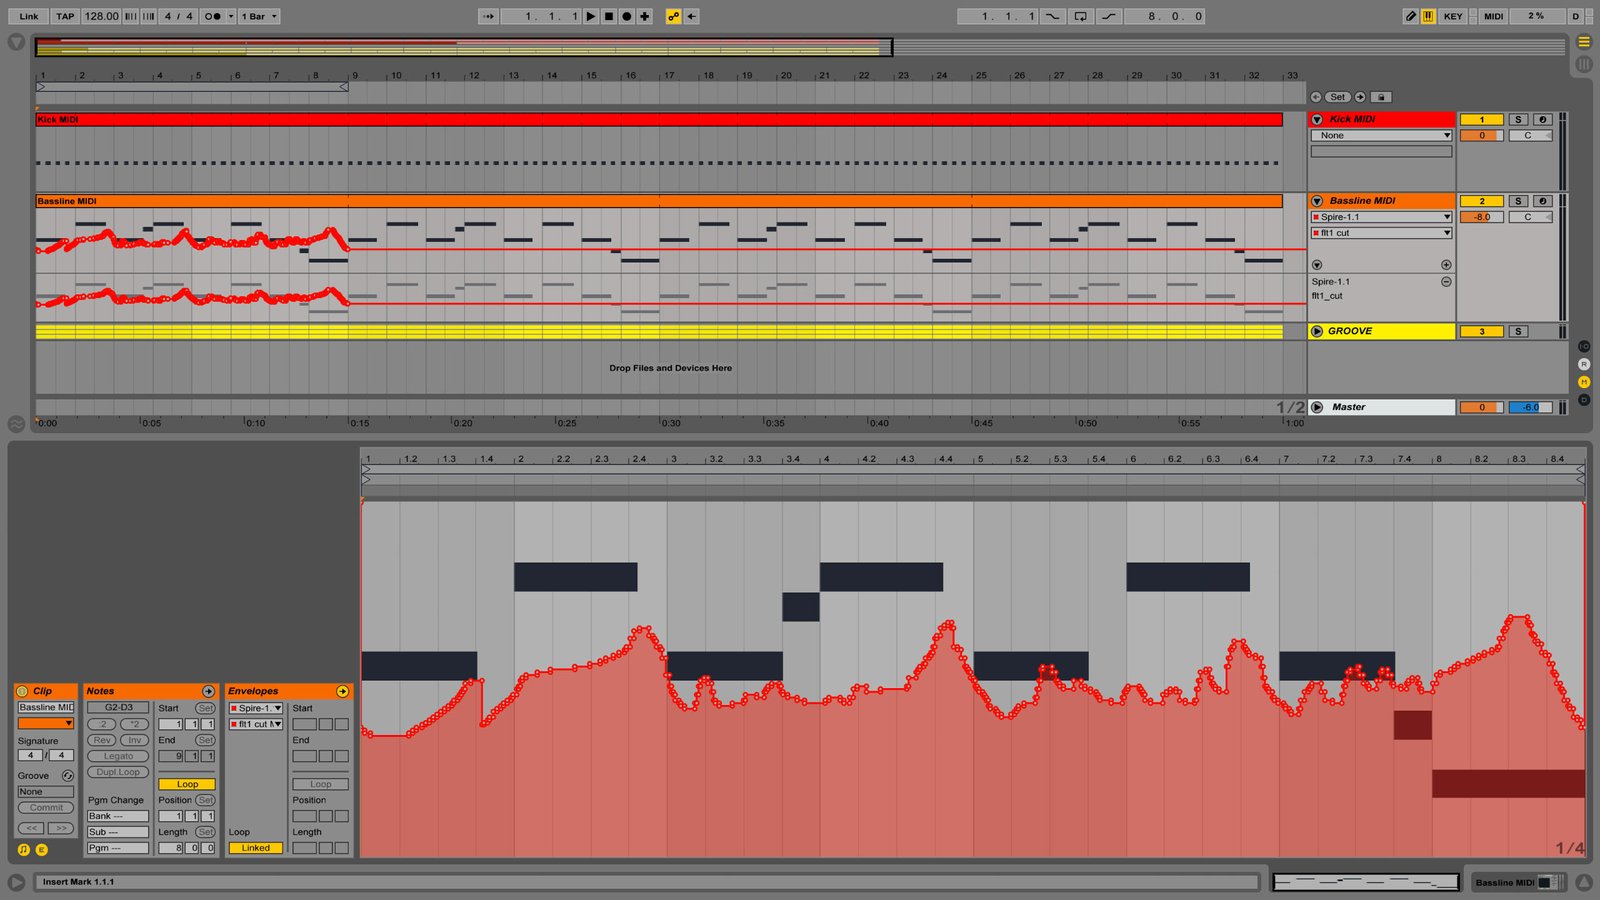
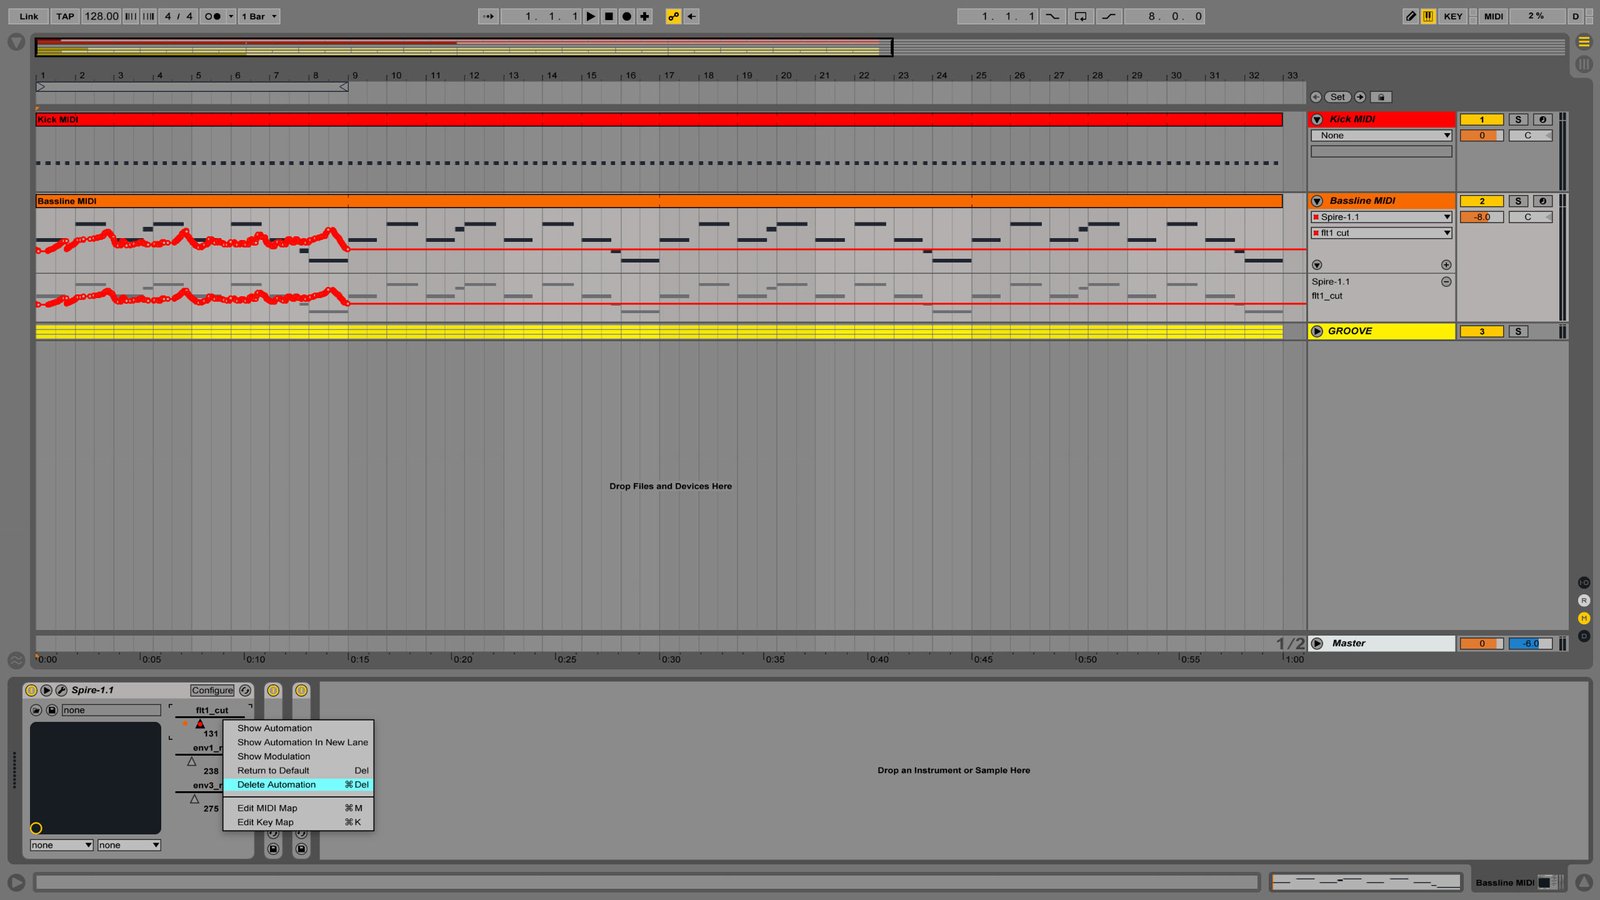
Now delete the automation since we don’t need it anymore. Do the right click and select “Delete Automation”:
Now all you have to do is to drag the parameter (the little black triangle) up to its maximum value. Remember that modulation controls parameters relative to their volume:
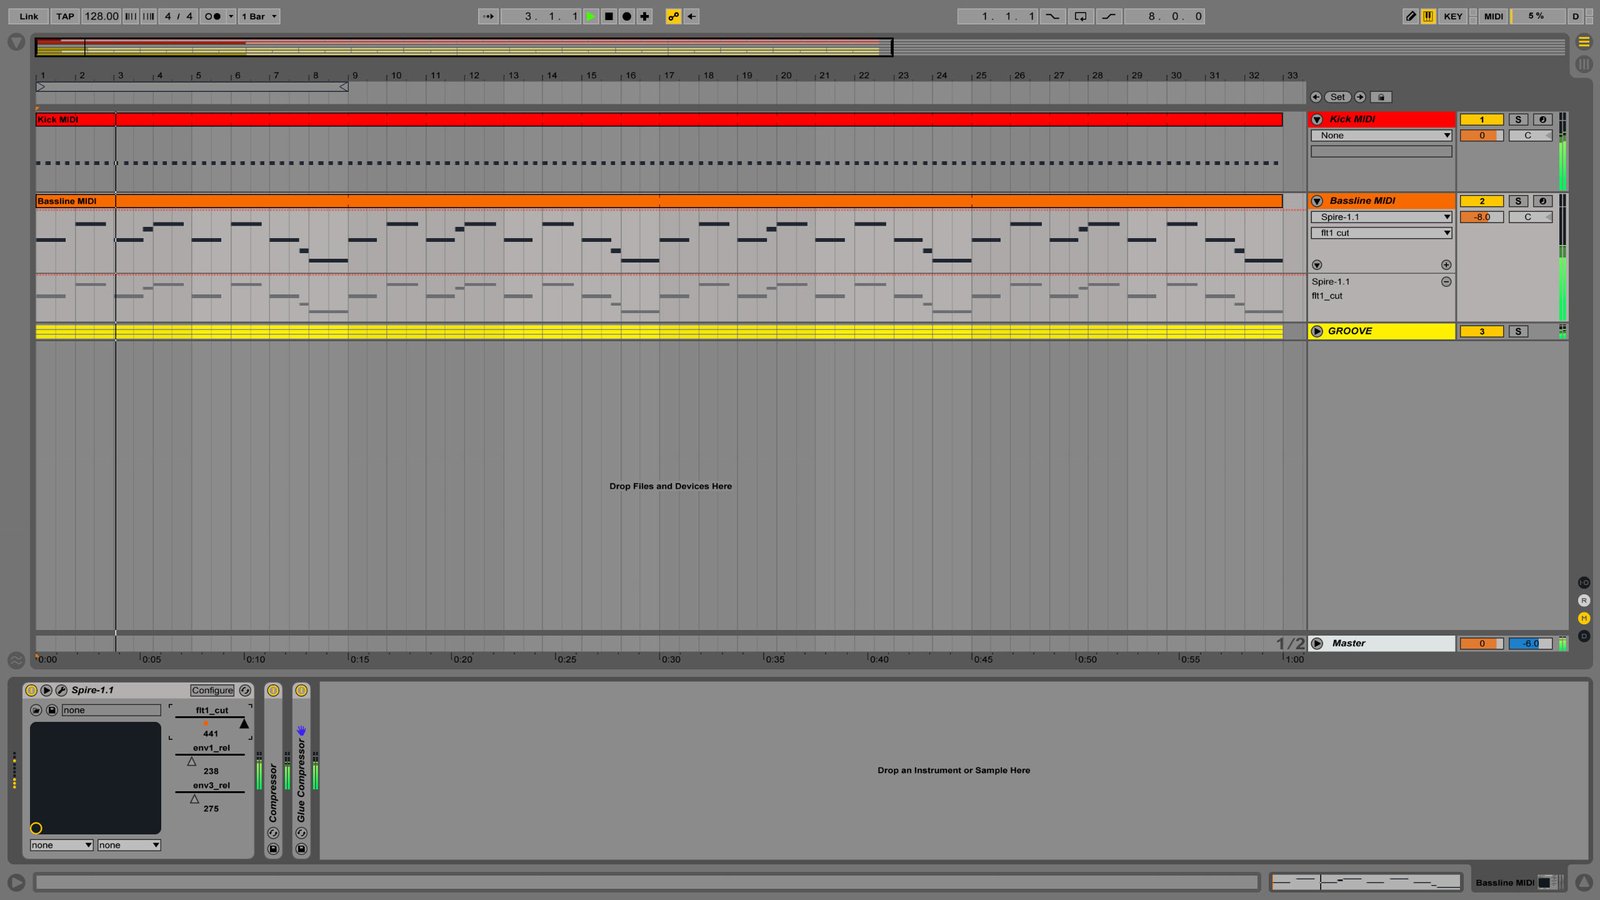
And that’s it. Now you can stretch out your MIDI-clip as long as you want, and the modulation will follow. I’ve recorded a quick screen video just to show it in action:


