The redline: decibels explained
I’m quite confused with the volume meter indicators on DJ mixers. Is it allowed to go over 0db? What is the recommended volume level? Why there are plenty of DJs pushing it hard above the redline?
Thomas
Thomas, to answer this question we have to understand what the “red line” and its corresponding numbers actually mean. For instance, does number 10 next to the red LED means overall loudness or what? Such things can be confusing even not among amateurs. Let’s go a little bit deeper into the physical properties of the sound and its perception by human ears.
One of the properties of sound, the amplitude, we perceive as loudness. And while most measurements are linear, our ears perceive loudness logarithmically, i.e. by the ratio between two signals. To reflect changes in the volume close to its human perception, we’ve got a unit called decibel (dB). But the decibels are tricky, as basically it’s nothing but a ratio — it only says how loud one sound is relative to another.
There are two ways to express loudness in decibels: by so-called “dB Gain” and “dB Level”.
“Gain” is the ratio between the sound and its different volume levels. For instance, the fader in a typical DAW mixer is an example of dB Gain. Putting it on -6dB will make the sound by 6 decibels less than it was originally recorded. The “Trim” knob on top of each Pioneer’s mixers channel is a Gain too.
“Level” is the ratio between the level of the sound relative to some reference level. Several standard reference levels are used to measure the ratio in those particular scales. Now I’ll talk only about two of these scales (there are more, but they are not related to the subject). Here they are:
| Sound form | Decibel scale | Reference level |
| Electrical sound waves | dBu | +4 dBu Standard operating level for professional audio |
| Digital sound waves | dBfs | 0 dBFS Maximum operating level in the digital systems |
The physical form of the sound in professional analogue equipment comes as an electrical sound wave (voltage) and uses a scale known as “dBu”. In this particular scale, +4 dBu is the highest average level that a steady audio signal can have, excluding transient peaks.
Audio signal above the reference level (+4 dBu) gradually becomes more distorted, that’s why momentary peaks can be allowed to exceed. The difference in levels between the steady audio signal and the peaks is known as “headroom”. Professional-grade analogue equipment can output maximum levels of +26 dBu, which gives us 22 decibels of headroom.
Setting Sound System Level Controls by Dennis Bohn, Rane Corporation, 1997
Digital sound waves use a scale known as “dBfs”, where “fs” stands for full scale. As mentioned above, 0dBfs is the maximum operating level on this particular scale.
Unlike analogue audio, digital audio doesn’t have such thing as a maximum average level, hence why 0 dBfs is the average and the peak levels at the same time. Even average levels can be increased up to 0 dB without distortion; however, anything above instantly becomes distorted as the information gets literally lost. That means that steady audio signals can be recorded at a higher average level in digital systems than they could be in analogue systems. For instance, 0 dBfs could be equivalent to an analogue level of +24 dBu and still sound clean, while the average level in the analogue system will be very distorted.
Now comes the most tricky part. Volume meter on DJ mixers reflects directly neither dBu, nor dBfs scales, which means 0dB VU (volume unit) on a DJ mixer doesn’t necessarily equal 0dBu output.
When converting between digital and analogue systems, these correlation levels must be calibrated, and they can be calibrated differently. A pretty common calibration that is used in digital mixers is the following: -20 dBfs = +4 dBu = 0 dB VU. But the correlation (in other words, the headroom) varies from one piece of gear to another. To give an example:
| Calibration: -20 dBfs = +4dBu | Calibration: -12 dBfs = +4dBu |
| 0 dBfs = +24 dBu | 0 dBfs = +14 dBu |
| -10 dBfs = +10 dBu | -10 dBfs = +8 dBu |
| -20 dBfs = +4 dBu | -14 dBfs = +4 dBu |
| -30 dBfs = -6 dBu | -20 dBfs = -2 dBu |
As you can see, it is really hard to say the exact correlation between dBfs and dBu, even the same model can be calibrated a little bit differently. This said, 0dB on the mixer volume meter can mean pretty much anything unless you know this particular device’s specs and calibration settings.
For instance, the Pioneer DJM-900 Nexus mixer has 19 dB of headroom (above the zero mark), allowing for that much volume jump before you hit the clip level. This is a sort of foolproof protection; otherwise, we would experience hard clipping even at the very first yellow LED indicator.
Let’s see what some vendors say about the volume control of their products:
Pioneer: “If you experienced distorted sound, adjust the Master Level control so that the master channel level indicator lights at around 0dB at the peak level. ”
Pioneer DJM-900 Nexus Operating Instructions by Pioneer Electronics, 2010
Rane: “Follow the golden rule and keep your level meters out of the red. Think of a level meter as a traffic light. Green means you’re ok to proceed, yellow means caution and red means stop. When level meters hit red, you run the risk of clipping or simply distorting the heck out of the audio. In case you’re wondering, both sound terrible.”
How-to properly set Rane mixer level controls, Rane Knowledge Base
Allen & Heath: “The main meters follow the selected monitor source. The meter reads ‘0’ for an XLR output of +4dBu. The mixer should be operated with these meters averaging around 0dB with loudest peaks no higher than +6dB”.
Allen & Heath Xone DB4 User Guide, Allen & Heath Limited, 2010
So, let’s recap: yes, it is possible to go over 0dB on some DJ mixers without having distortion. However, it is not recommended to go up to the red line as it may cause hard clipping — even vendors recommend sticking around the green zone, with momentary peaks into the yellow, for a reason.
Keep in mind that most venues use compressors or limiters in order to protect their expensive PA systems, so pushing gain all way up will not make the sound louder but rather make it over-distorted.
If you really feel that the overall sound is not loud enough, find the sound guy, and ask him to boost the volume up on the PA instead. This way you could stay in the safe zone while overall sound will be loud and clean.
A special side note for Ableton users, those who play live using Ableton like myself. We know that going above 0dB in digital audio literally kills the sound, so it is important to understand that all your efforts to stay in the green zone on the DJ mixer will be meaningless if audio that comes from Ableton already has clipped.
If faders on your Ableton mixer are set to 0dB, and you put some audio effect device on top of this channel, like EQ, it is natural that sound will go over zero decibels, hence clipping. To prevent this, I advise setting a maximum value for Ableton faders at -5 or -6dB. Even if you put MIDI-controller fader to its top position, in Ableton, it will still be capped at -6dB, and thus you’ll get an extra 5-6 dB of “headroom”.
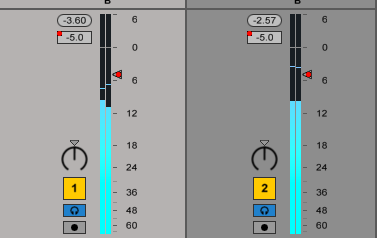
The same applies to any other software, make sure to adjust volume control within the program before checking and tweaking volume meters on a DJ mixer.
As for your last question Thomas, I guess there is a common misunderstanding among many DJs, so I hope this advice will shed some light.
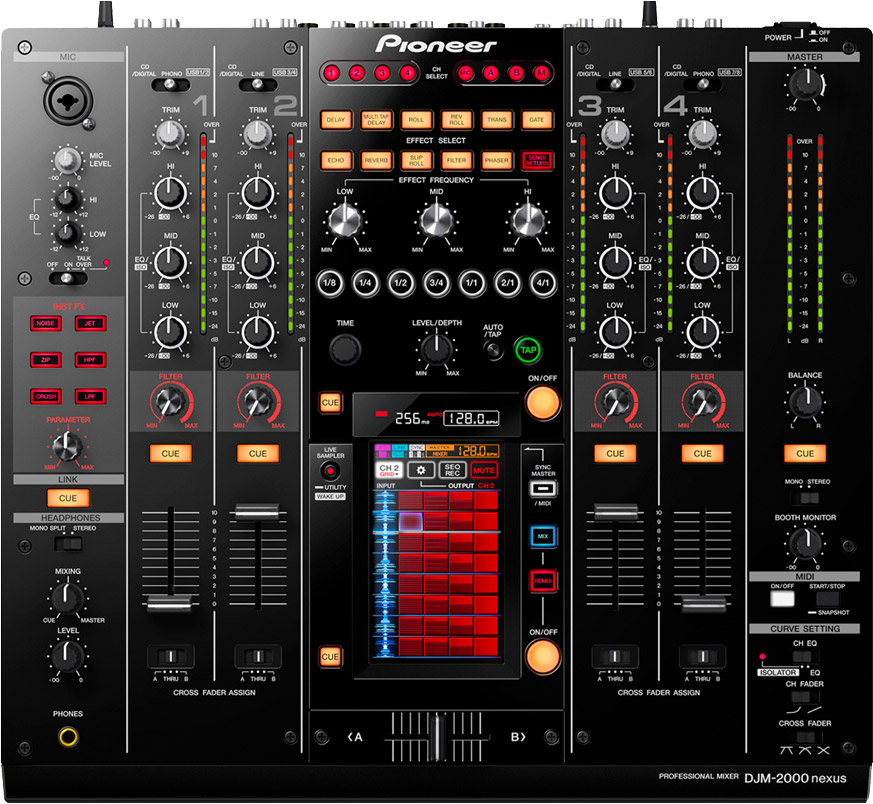
On cover image: Pioneer DJM-2000 Nexus.
Thank you very much!
Very good article!