Making a robotic texture sound in Spire
Could you explain how you got to producing that arp on Machinery (Preview) at 0:02 sec?
Mohammed Sharook
I’m glad you asked because I love that sound and quite satisfied with it :-)
In few words — it’s all about a comb filter. That particular filter type is what makes the sound so badass and “robotic”. But let’s try to recreate this sound entirely from scratch.
First things first, we need to use a synthesiser that has a comb filter. For instance, Sylenth1 which I know many Psytrance producers use a lot, won’t work in this case since it doesn’t have that filter. So, for this example, I’m gonna use Spire.
Let’s create a new MIDI channel, put a new instance of Spire with initial preset, and draw a MIDI note. Keep in mind that actual note on a piano roll doesn’t matter because we gonna use noise as a waveform which obviously doesn’t have a tone.
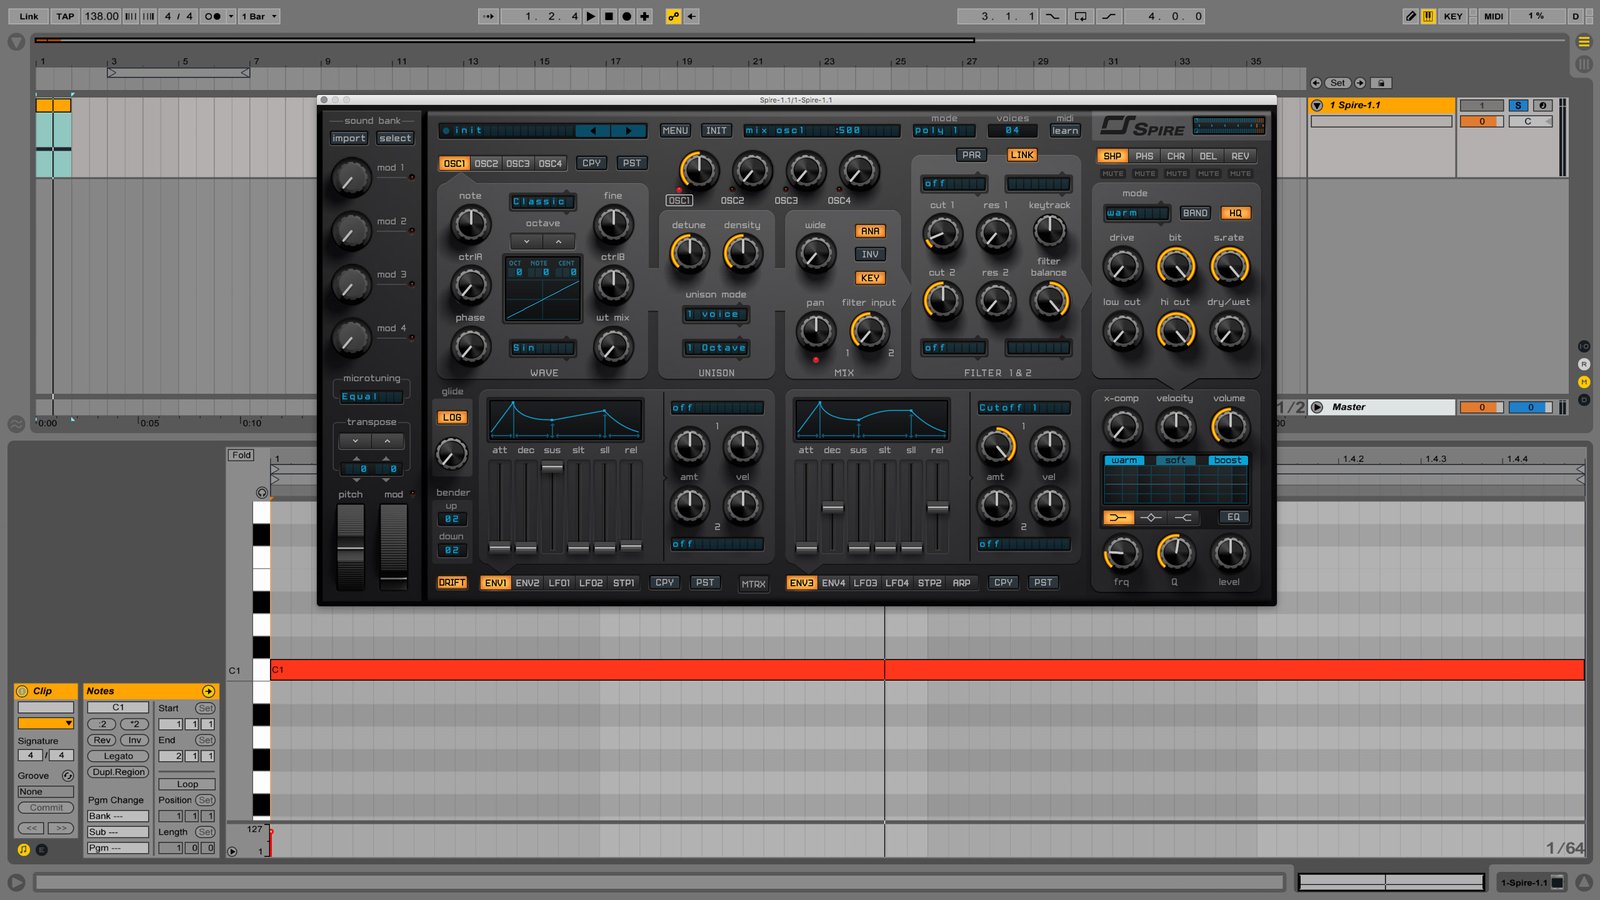
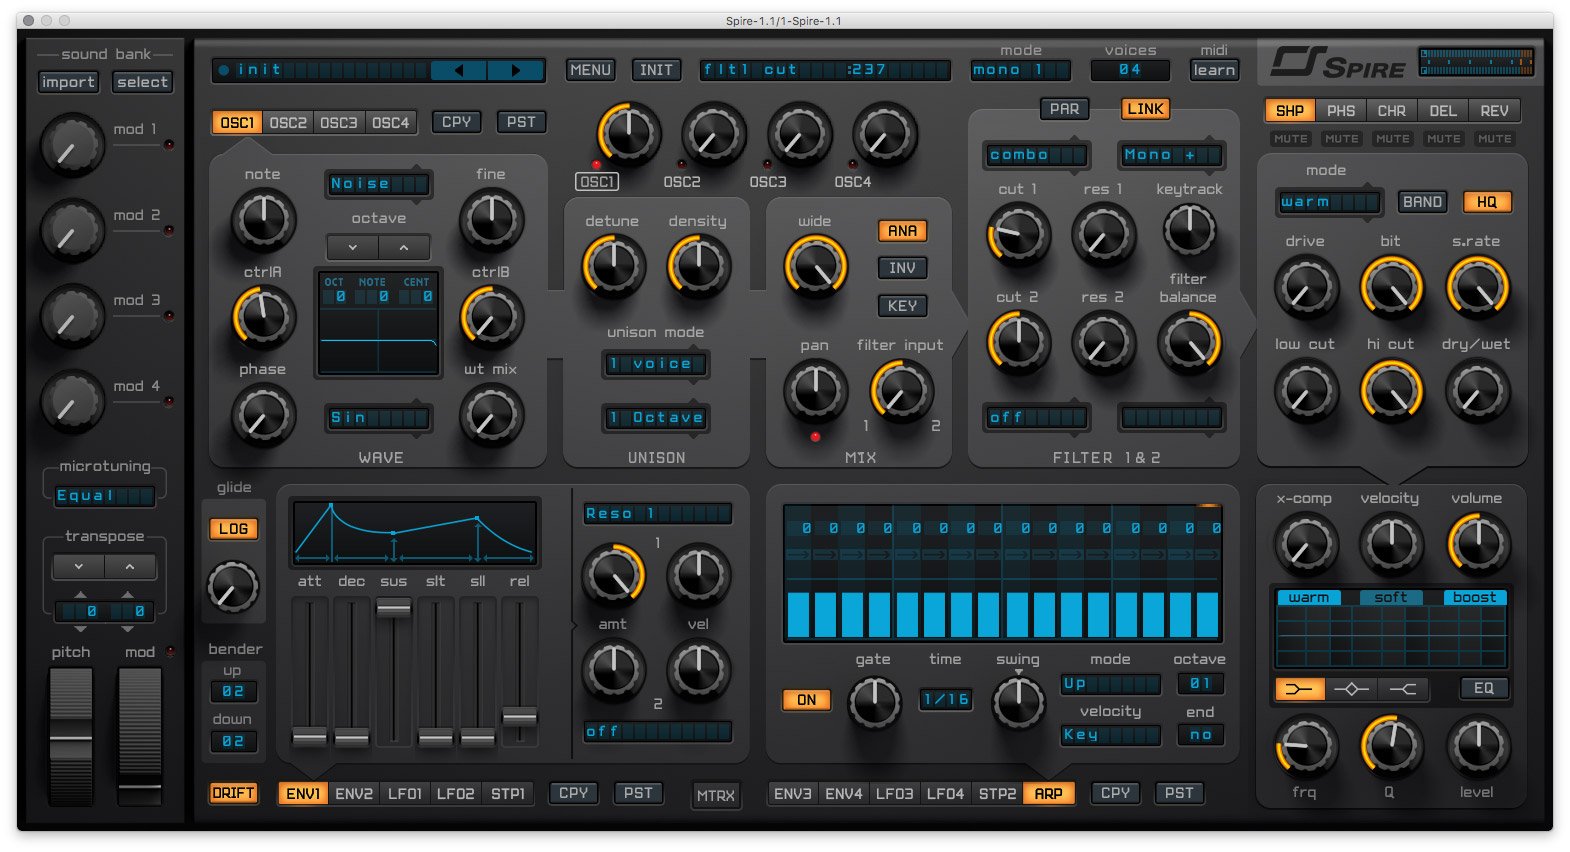
Now let’s do some tweaks. In the oscillator section, change Classic mode which is set by default to Noise. Right next to it, turn off oscillator key tracking and turn the Wide knob all way to the right.
By default, Envelope-3 in Spire is mapped to a filter cutoff. We don’t need it here, so set it to “Off”. Here is what we’ve got so far:

Nothing fancy so far, just a basic noise sound. Now, turn on the arpeggiator at 1/16 notes to add some rhythm. Map Envelope-1 section to the filter resonance and crank up its amount to a maximum position, and also slightly adjust the Release parameter for 15~20% of its total volume.
Now comes the most interesting part: in the filter section which is off by default, choose the combo (Mono+) filter type. You should notice a pretty dramatic change as soon as you have done it. What’s interesting about this filter is that its cutoff frequency determines the actual tone of the sound. For example, at cutoff about 235~240 (Spire’s value, not Herz), we get the sound at G# — that’s the root key of Machinery since you asked about that track:
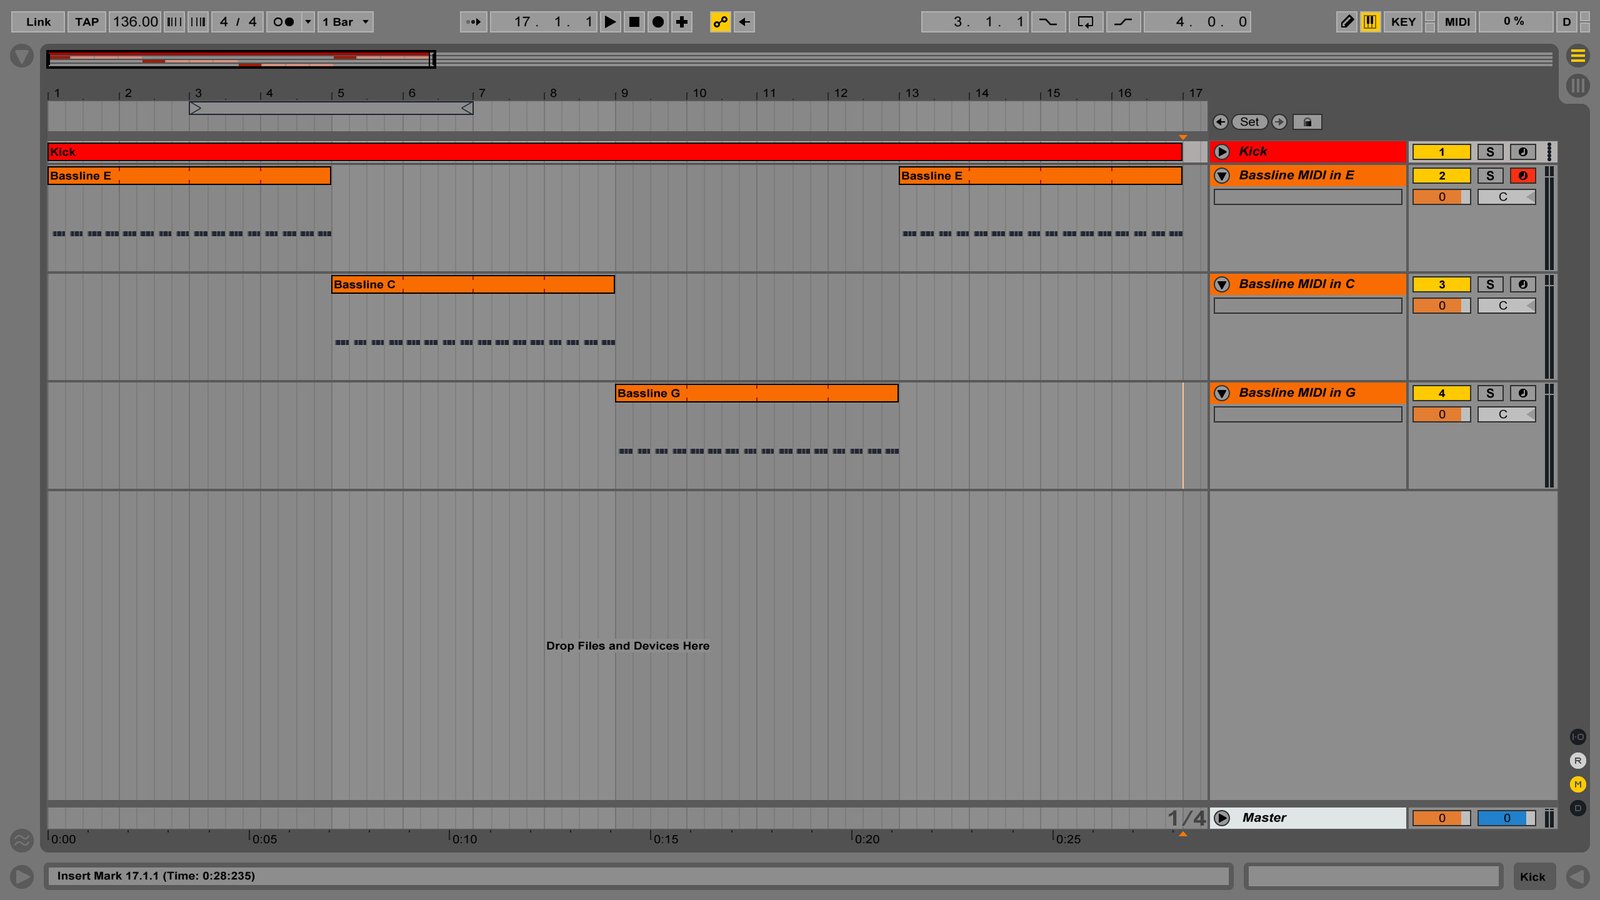
That’s pretty much the basics. Now you can add EQs, compression, delays, reverb, more filters, play around with arp gate parameter, and more. With this in mind, you should be able to make something like this:
Or add any twist to this sound, as you like. I hope it helps.


Thank you so much for the advice, Daniel! I am going to keep this mind and gonna keep you posted on more questions from my side!
Great tutorial, thanks. I was overlooking the Spire’s comb filter for no reason.
How do you tune the comb filter, by ear?
Typically, I tune it by ears and using Spectrum for better precision.
Thank you for the advice bro ! more tips please!
Great tutorial!
Awesome tutorial! But can you please specify which type of settings are you using for the send delay/reverb here, for the synth?
I think for this example I’ve been using built-in Spire reverb with default settings, and as for delay it probably was Replika (see recommended processing plugins).
Thank you, Daniel, on your swift and constructive answer!
Will try Replika for sure!